
Today I have a thank you card for you, using the Stampin Up Layers of Beauty bundle. This bundle consists of a stamp set, dies and five masks that you layer to colour the rose image. It’s one of my favourite bundles in the 2024 Stampin’ Up! Annual Catalogue.

How to use the Stampin Up Layers of Beauty Bundle

I have a video below which shows how I have coloured this image, as well as further pictures below. Here are the step by step instructions for using the Stampin Up Layers of Beauty bundle though.
- Firstly, stamp the image onto your Basic White (or other light coloured) cardstock. If you want to have a no outline look, stamp in a very light colour such as Basic Beige, Gray Granite or Smoky Slate.
- Secondly, colour the image using the 5 layering masks and blending brushes. The video below shows you step by step how to do this, and also provides tips for lining up the masks perfectly each time. For the colouring in this card, I used Bubble Bath and two shades of Moody Mauve for the roses. For the leaves I used two shades of Old Olive.
- Finally, cut the image out using the dies. There are also additional die cuts you can use for layering.
Here’s what I had once I die cut the image.

Next I cut it in half using my Stampin’ Trimmer. This gave me two large pieces that I could align to the left side of the Basic White cardstock piece. You can see that I also removed the small flowers top right (I used paper snips for this) to give a better silhouette. The Basic White piece I am attaching the pieces to is 8.5cm x 12.8cm (or if you are using imperial measurements go for 3 1/2″ x 4 3/4″).

Finishing off the Card
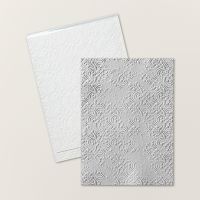
To finish off my card, I stamped the sentiment in Moody Mauve onto the bottom right hand corner of the Basic White piece. I place a Moody Mauve mat on the Basic White cardstock piece and added it to a Crumb Cake base card. I embossed the Crumb Cake card front using the Distressed Tile embossing folder. The area that isn’t embossed at the bottom wasn’t intentional, but I liked how it looked so I left it! Finally I added three embellishments from the Purple Fine Shimmer Gems.

I hope you have enjoyed today’s card. You can find all the products I have used to make it in my online store. Access each individual product using the links at the end of the post.

Earn a Bonus Days $9 Coupon with each $90 spent in July
Earn a $9 coupon for every $90 product ordered (before postage) in any one transaction between 3rd – 31st July. So for example if you order $180 product, you will receive 2 bonus day coupons for that order. Coupons are sent to you by email after the order. There are no limit to the number of coupons you can earn per order or during the whole month, Coupons can then be redeemed in August. You still get gifts if you shop online and use the host code too, so it’s like double dipping!!

Earn FREE Gifts when you shop with me
Anyone who orders $50 or more with me in July, will be receiving a Fun Fold class kit by mail with all the instructions and materials needed to make a WOW fun fold card!
If you are shopping online with me and spend over $50, don’t forget to use the July host code for free gifts in mid August. When your order is over $250, don’t use the host code as you will be able to choose your own gifts when you check out.

This month the host code gifts will be a combination of samples of the Iconic Celebrations 6×6″ DSP and the Cherry Cobbler and Pearl Adhesive Backed Berries.


If you would like regular communication from me with free step by step tutorials, don’t forget to subscribe to my newsletter!

Thanks so much for checking in today. You can view all the products used in today’s post using the links below. See you again later in the week for more inspiration.
Claire
Product List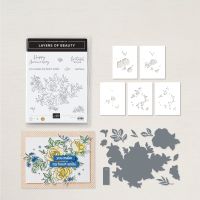


I just love this card. I’m going to have to make one for a friends birthday later in the week. You do such wonderful work and I always look forward to your latest creations.