
Today I am sharing two hand made Christmas Cards based around the Stampin’ Up! Joyful Days Memories and More Card Pack. This is for week 5 of our fabulous Art with Heart Team Heart of Christmas blog hop.

Here’s a look at the two cards I made this week. The gold foiling from the rub-ons was a little hard to photograph under lighting.

About the Stampin’ Up! Joyful Days Memories and More Card Park
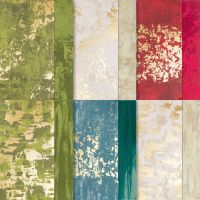
Let’s have a look at the Joyful Days Memories and More Card Pack, which is what my cards today are based around. This is a bargain buy in the September to December Mini Catalogue at only $20.25AUD for 54 cards. Additionally there are a range of coordinating colours for this pack, so it’s easy to find things in your existing stash of supplies to make up the cards. The documented coordinating colours are Cherry Cobbler, Mossy Meadow, Old Olive, Secret Sea, Strawberry Slush. but I think Real Red and Gold works really well too.
You can find the links to the products, including these, at the end of the post.

The thing I love about this card pack is:
- The cost – just $20.25 AUD for 54 double sided coordinating cards which can be used for cardmaking or memory keeping;
- Individual cards can be combined with embellishments, paper and cardstock you already have at home, to make a variety of great cards;
- They make creating quick and easy which is perfect for duplicable Christmas cards.
Instructions and Measurements
My aim today was to take the basic card and embellish / bling it up a bit with products I already had at home. Here’s what I have come up with.
CARD 1
For my first card, I chose the 3 x 4″ card with the loosely watercoloured wreath image.


It’s a little bit hard to see the gold foiling around the wreath centre on that image, so here is a close up as well.

Instructions and Measurements for Card 1
- I started with a top folding standard sized Mossy Meadow card (10.5 x 14.8cm or 4 1/4 x 5 1/2″).
- Next I added a piece of Season’s of Elegance Specialty Designer Series paper – the Mossy Meadow sheet with gold foiling. This is still available in the online store (links at the end of the post), but I had some left over from last year. The size of this piece is 10.2 x 14.5cm for the metric sized card and 4 1/8 x 5 3/8″ for the imperial version.
- Cut a piece of Real Red cardstock 4.5cm x 13.5cm (or 1 3/4″ x 5″). Cut a banner end at the bottom and emboss with your embossing folder of choice. Embossing is optional. Adhere this piece to the centre and middle of your card.
- The next step is to mat your Memories and More card first in a thin mat of Real Red cardstock, and then a slightly wider mat of Gold Foil.
- Before you adhere the card, you also want to apply the gold metallic rub on to the centre of the wreath. To do this, cut around the section you want to use, position it and then rub over the area with your bone folder. These are so fun!
- Now you can attach the Memories and More card over the banner, using Dimensionals.
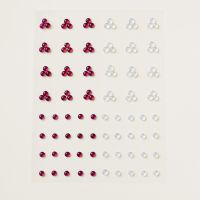
- Next we are going to embellish the wreath a little more by adding some of the Cherry Cobbler and Pearl adhesive backed berries. These were one of my favourite embellishments released in last year’s Holiday Catalogue. I am very pleased they are still available to purchase.
- Finally we need to add our embellishment. I chose one of the circle shaped gold foiled sentiments from the Greetings for You Mix & Match Ephemera Pack. This is popped up with Dimensionals.
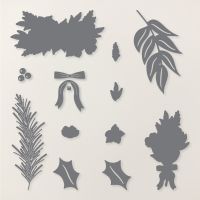
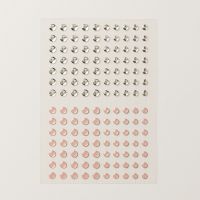
- To add a little extra embellishment I die-cut a bow (this is from the Christmas Greenery Dies) and added a gold embellishment in the centre. The embellishment is from the Low Profile Dots pack (link at end of post) which has Gold and Petal Pink adhesive embellishments.

CARD 2
For my second card, I based it around the 3×4″ Stampin’ Up! Joyful Days Memories and More card with the loosely water-coloured Christmas tree on it. I also used one of the 4 x 6″ cards with the plaid pattern.

Instructions and Measurements for Card 2
- As with my first card, I started with a top folding standard sized Mossy Meadow card (10.5 x 14.8cm or 4 1/4 x 5 1/2″).
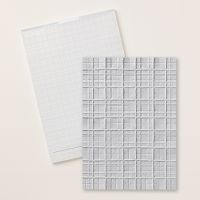
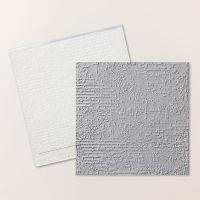
- Secondly, emboss the front of the card with the Forever Plaid 3D embossing folder (links at end of post) to coordinate with the plaid pattern on one of the cards.
- Thirdly, using the Branching Out Dies, die cut the large plaid card with the 2nd largest die, and the tree card with the 4th largest die. Then the plaid piece is attached straight to the card front, and the tree piece is attached with Dimensionals.
- Next, embellish the tree card. I used some of the single embellishments from the Cherry Cobbler and Pearl adhesive backed berries. I also had a random adhesive star in my stash (not even sure where this came from) and popped that on top of the tree.
- Finally I added a double bow of gold thread underneath another of the gold foiled sentiments from the Greetings for You Mix & Match Ephemera Pack.

More 2025 Stampin’ Up! Christmas Card Ideas from the Art with Heart Team
Now it’s time to see what some of the other lovely ladies in the Art with Heart Team have made for this week’s Christmas blog hop. We are hopping up to Sydney’s northern beaches now, to visit our lovely friend Catherine Proctor.

If you lose track anywhere along the hop, you can head over to Sharon Davern’s blog. Sharon coordinates our blog hop each week and has the full list of participants and links on her blog.
Join Stampin’ Up! in Australia with the Art with Heart Team in October for the Special Deal of $60 all inclusive!
This is the best joining offer Stampin’ Up! has ever offered! There are actually two deals, but I think the $60 one is especially great value. You also get FREE postage on this starter kit and you don’t need to spend anything further unless you want to continue as a demonstrator beyond April 2026.

or

You can join just for yourself to enjoy the discount and community while you pursue your papercraft hobby. Or maybe you would like to start your own little business and earn some supplementary income by running classes, selling to customers or building a team of your own. Our awesome Art with Heart Team has been around in Australia for over 18 years and we aren’t going anywhere. You can join with us from anywhere in Australia and we will make you feel welcome with our virtual team group and our in person events, craftalongs, classes or coffee catchups.
Get all the details of this amazing offer HERE, or contact me to discuss by phone or email. We would love to have you join us.
How to buy Stampin’ Up! products in Australia either online or direct
You can purchase any of the products used today (and lots more) from me straight to your door anywhere in Australia. There are links for the individual products at the end of the post, or you can click the Shop Now button below and search the names. Alternatively, please contact me if you would like to order directly. You can still order online exclusives directly with me as well.

Let’s Keep in Touch
Thanks for stopping by today. To keep up with all the news and get weekly project ideas, subscribe to my subscriber newsletters (Subscribe HERE). Better still, purchase from me to get the VIP treatment with free catalogues, free weekly tutorials, awesome customer service and product tips!
See you again soon, If you would like to ask any questions about today’s project, please contact me.
Claire
Product List





Two wonderful cards Claire. The Joyful Days M&M cards are so festive. You have sued them brilliantly. Love your combination of M&M cards with other SU products. I must get my card pack out and make Christmas cards. xxx
Two wonderful cards, Claire. I love the metallic rub-ons for the bedautiful shine and that watercolour tree is pretty. Great use of EF toos!
Claire a great choice of different products to build your cards around the focal cards from the Joyful Days Memories and More card pack. Love the embossed bits and embellishments on your beautiful cards.
Love the rich colours in the Memories & More Cards and the touches of gold really add to the lush look. I especially love the second one with the plaid mat and plaid embossing folder combo.