
I knew the Stampin Up City Sights Kit was for me the moment I saw it! I just loved the warm colour palette which was perfect for masculine cards, and the cityscape design on the cards and stamps were a winner too.
You can find the City Sights kit here in my online store. This all inclusive kit is $37. Here’s what you get in the box. You can make 8 cards from the kit contents and it also comes with mini stamp set and a Pebbled Path ink spot.

Here’s a closer look at the stamps included.

Here are the two card designs from the kit instructions.

Stampin Up City Sights Kit Alternative Card Designs
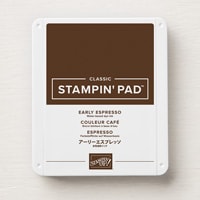
You can make much more with the kit though, so here is what I cam up with after making one each of the base cards. For this first card, I just repeated the Cityscape stamped design in Early Espresso ink. Then just add the embellishments, sentiment and blue banner from the kit.

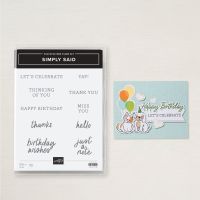
For this one, I added in some Copper Clay cardstock and only used the background stamp. The ‘birthday wishes’ stamp is from the Simply Said sentiment stamp set.

Three more base cards from one printed card.
For the next 3 cards, here’s how I cut up one of the pre printed card designs.

Next I used these pieces as additional elements on cards. I used one of the longer pieces from the back of the card for the centrepiece on this card. Stamp the cityscape stamp in Early Espresso along the length, and then add a thin may of Boho Blue cardstock. Then I put that aside while I finished the rest of the card. First, I have repeated the cityscape stamp on the Pebble Path card front. Next I added a few pieces of coordinating cardstock (Early Espresso, Copper Clay and Night of Navy) staggered in the centre of the card. Finally, attach the main image panel we prepared earlier using Dimensionals. Stamp the ‘Happy Birthday’ sentiment from the Simply Said sentiment stamp set onto a piece of Crumb Cake cardstock to finish off.

Next I used the other long piece and one of the front pieces for this card. This one is pretty self-explanatory. I found it helped to sponge the edges of each of the two big pieces here for a bit more definition. Lift the sentiment piece up up with Dimensionals on this one.

For this final card I used the last front piece of the card. It’s a bit hard to see but I also stamped the cityscape stamp at the bottom of the card (Early Espresso ink on an Early Espresso base card). For the Boho Blue piece under the sentiment, I turned over one of the greeting pieces in the kit and sponged Boho Blue ink onto it. Lift the sentiment piece up with Dimensionals on this one too.

Pin this Idea for Later
I hope you like these alternative designs using the Stampin’ Up! City Sights kit. I definitely recommend the kit as it’s awesome for masculine cards and is just $37. Even after making one of each of the kit cards, and these 5 alternatives, I still had LOTS left in the kit to play with. Plus the stamps and ink spot. Pin this image if you want to save these alternative ideas for later.

Earn FREE Gifts when you shop with me
Anyone who orders $50 or more with me in July, will be receiving a Fun Fold class kit by mail with all the instructions and materials needed to make a WOW fun fold card!
If you are shopping online with me and spend over $50, don’t forget to use the July host code for free gifts in mid August. When your order is over $250, don’t use the host code as you will be able to choose your own gifts when you check out.

This month the host code gifts will be a combination of samples of the Iconic Celebrations 6×6″ DSP and the Cherry Cobbler and Pearl Adhesive Backed Berries.


If you would like regular communication from me with free step by step tutorials, don’t forget to subscribe to my newsletter!

Thanks so much for checking in today. You can view all the products used in today’s post using the links below. See you again later in the week for more inspiration.
Claire
Product List


0 Comments