
Hello friends. As the title suggests, today I want to give you some ideas on how to use the Stampiin’ Up! Christmas Tags and More 6×6″ paper and die cut pack. This paper pad is the perfect starting point for a bunch of quick and easy cards. You can add extra die cuts and bling from your stash to add some extra wow if you choose. These projects are for Week 10 of the Art with Heart Team Heart of Christmas Blog Hop.

Here’s a group picture of the four cards I made. These were made in an hour or so and I’m really happy how they turned out.

About the Stampin’ Up! Christmas Tags & More DSP
The Stampin’ Up! Christmas Tags and More DSP pack is a 6×6″ paper pack which also includes some coordinating die cuts. It’s $21.75 and you can find it HERE in my online store. The coordinating colours are Cherry Cobbler, Crumb Cake, Garden Green, Real Red, Soft Sea Foam. This unique assortment of paper and precut images makes it easy to coordinate colours and images on your Christmas cards and gift tags. It includes full-sheet designs, cut-apart designs for card fronts and tags, and precut images for quick accents. You get 32 sheets of 6×6″ patterned paper (8 each of 4 double-sided designs) and 4 sheets of precut coordinating images (2 each of 2 single-sided precut designs). Here’s an image but you can see each individual page and all the die cuts HERE in the store.

A closer look at each of my Stampin’ Up! Christmas Tags & More DSP cards
Card 1

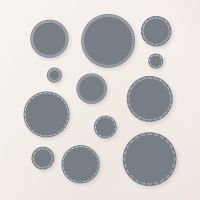
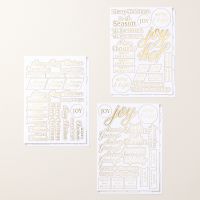
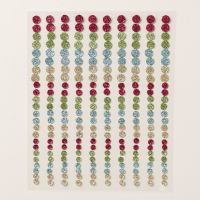
Real Red is the base card colour for all four of the cards. You will need to cut three of the second smallest square dies in the Stylish Shapes dies (which are 3.8cm or 1.5″ square if you are cutting rectangles). Cut 4cm off the side of the front of the card and then add the extra piece which is a 5cm x 13.5cm piece of DSP with a Real Red mat. The size of the DSP piece on the left is 6.2cm x 14.4cm. Adhere the squares and the die cut images with Dimensionals. Add some bling to the small die cuts by using the Traditional Sparkling Sequins (now back in stock). For a quick adhesive sentiment, use the Greetings for You Mix and Match Ephemera. Finally add a piece of Basic White cardstock 8cm x 12.5cm with a strip of coordinating DSP inside the card so it is covered by the outside layers. You can find all the links at the end of the post.
Card 2

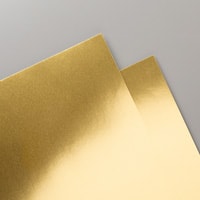
For this one, you need to cut a decorative circle from Gold Foil cardstock to mat the wreath die cut. The Spotlight on Nature dies are perfect for this. You will also need an additional square piece of DSP (other than the base DSP piece) which is 7.7cm square and mat with some Real Red cardstock. Adhere the DSP square, the gold foil circle and the bird with Dimensionals. Also add some Traditional Sparkling Sequins on the wreath and holly leaves, and some metallic gold thread under the bird. Adhere another of the Greetings for You Mix and Match Ephemera sentiments. Finally add a piece of Basic White cardstock 13.8cm x 9.5cm with a strip of coordinating DSP inside the card.
Card 3

For this one you just add a couple of the die cut baubles over the original bauble patterned paper piece. Adhere with Dimensionals and add a die cut bow with a Traditional Sparkling Sequin to each. Use some of the die cut strip pieces to adhere your sentiment too, and pop it over some gold metallic thread. Finally add a piece of Basic White cardstock 13.8cm x 9.5cm with a strip of coordinating DSP inside the card.
Card 4

For this one you need to cut 2cm or 3/4″ off the bottom of the card front. You will also need three more die cut squares the same size in card 1. Also cut three different DSP pieces: base layer is 14.3 x 8cm, next one up is 11.2 x 6.8cm and the one under the square is 13.2 x 5cm with a thin Real Red mat (this layer is adhered with Dimensionals). Lift up the die cut images with Dimensionals, and add a Traditional Sparkling Sequin to each one. Finally adhere one of the Greetings for You Ephemera sentiments with another Traditional Sparkling Sequin. The inside of the card for this one is a piece of Basic White cardstock 14.2cm x 7.5 cm with a strip of coordinating DSP added at the bottom.
I hope you have enjoyed today’s card ideas. If you have any questions, please contact me.
More Christmas Card inspiration from the Art with Heart Team
Now it’s time to hop along to the next person on the Art with Heart team Heart of Christmas blog hop, and to see what they have been making. Next we are heading to Rachel in Ringwood East.

If you get lost at any time, head on over to Sharon’s blog, as she has the full list of this weeks blog hop participants.
How to buy Stampin’ Up! products in Australia either online or direct
You can purchase any of the products used today (and lots more) from me straight to your door anywhere in Australia. There are links for the individual products at the end of the post, or you can click the Shop Now button below and search the names. Alternatively, please contact me if you would like to order directly. You can still order online exclusives directly with me as well.

Let’s Keep in Touch
Thanks for stopping by today. To keep up with all the news and get weekly project ideas, subscribe to my subscriber newsletters (Subscribe HERE). If you purchase from me in Australia, you will get even more, with VIP treatment, free catalogues, free weekly tutorials, awesome customer service and exclusive offers.
See you again soon,
Claire
Product List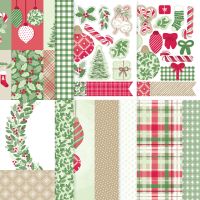





Love how you’ve used this paper – you’ve really shown it off. The extra details and layers make it look extra pretty.
Beautiful cards Claire, lovely way to use this DSP pack
What a festive set of cards Claire. I love all the layering and embellished bits. Very clever how you cut up the words from the sentiment in your first card.
Four amazing cards Claire. Love the extra layers and dimension you added. You did brilliantly to create them in such a short time. Impressive. xxx
Four fantastic cards, Claire. Love the additional layers and emberllishments that you have used!