
Hello crafty friends. Today I have a Christmas card idea for you using the Stampin’ Up! A Little Christmas Suite. This is for Week 3 of the Art with Heart Team Heart of Christmas Blog Hop for 2026. Between now and the end of November we will be sharing Christmas cards each Monday night at 8pm and you can hop through the blogs for lots of inspiration.

Here’s my Christmas card for this week. I decided on a Shaker card as I only have the DSP from this suite and wanted to use some of the cute images,

How to make my A Little Christmas Shaker Card
Making the base sections
Here are the instructions if you would like to recreate this card. You will find links to all of the products at the end of the post.
- Start with a base Old Olive standard sized card, and then cut another layer slightly smaller and emboss it with the Swirls of Magic Embossing Folder. This folder is perfect for so many occasions.
- Cut the image from the DSP and the outside piece of the Cherry Cobber frame using the 5th largest Everyday Arches die.
- Next cut the inside of the Cherry Cobber piece and the centre of the embossed piece, using the 6th largest Everyday Arches die.
- Place the embossed piece in position on the front of the card, and trace around the inside edge with a pencil. Don’t adhere yet, this is just to make it easier to position the DSP piece.
- Adhere the Cherry Cobbler frame around the gap in the embossed cardstock.
- Cut a piece of Window sheet large enough to cover the arch window, and adhere to the reverse of the embossed piece. Tip: rub the inside of the window sheet piece with an embossing buddy to deter the sequins from sticking to it.

- Adhere the image piece onto the base card using the pencil marks you made earlier as a guide.
- Arrange the edge of some Dimensional sheets (or some foam tape) around the outside of the image piece, ensuring all areas are covered.
- Add some extra Dimensionals around the outside so that the layer stays flat when adhered.
- Place some shaker sequins inside the Dimensionals, and adhere the top layer in place. I use some sequins from my stash as I am bit of a hoarder when it comes to these!

Embellishing the front and inside of your card
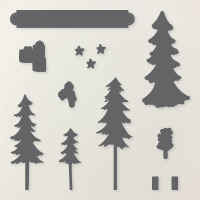
- Die-cut two of the trees from Holly Jolly Branches dies and adhere (slightly overlapping) to the bottom right of the arch.
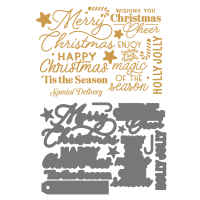
- Adhere your sentiment with Dimensionals over the top. This one is from the Magical Christmas Hot Foil Dies and is gold foiled onto Cherry Cobbler.
- Finally add one of the gold foiled stars (which is also part of the sentiment sheet I used in the previous step) to the top of the tree. I just adhered it with a glue dot over the window sheet.
- For the inside of the card I added a strip of DSP and a fussy cut image from the DSP.

I hope you have enjoyed this week’s project. You can find the links to all of the Stampin’ Up! projects I have used at the end of the post.
Follow the blog hop for more Stampin’ Up! Christmas card inspiration.
Now it’s time to visit the next person on the blog hop. We are heading to South Australia to visit Andrea Sargent. I sure she will have something amazing for us!

If you get lost at any time you can head over to Sharon Davern’s blog where she has a full list of participants for this week in her post.
Thanks for following our Heart of Christmas blog hop this week. See you again next week,
Claire
Product List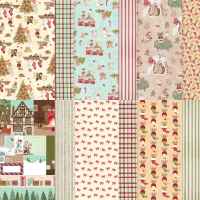






What a great shaker card. Love it.
Your card is SO beautiful. I love shaker cards and have not made one in a very long time. You have inspired me to give it a try this week. TFS
A wonderfdul shaker card with the arch dies and the hot foiling of the sentiment, adds a beautiful elegance. The little mouse on the inside is super cute too!
Such an adorable shaker card, Claire! I love how this project highlights the many things you can doo with DSP. We don’t always need an entire suite to create something beautiful!
A wonderful shaker card Claire, using the A Little Christmas DSP. So cute and lots of fun. xxx
Such a cute card Claire, I love it
Oh I do like your shaker card Claire and the DSP you have used is the perfect choice. Super cute!